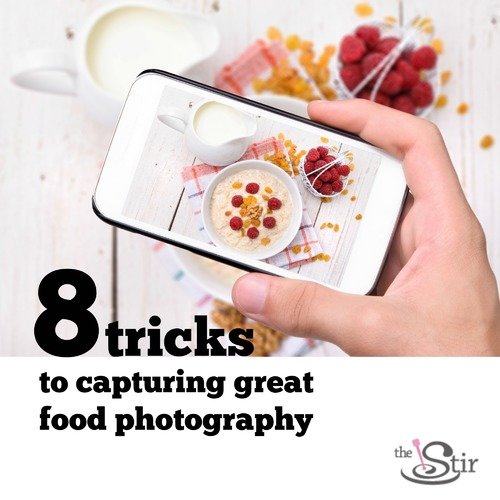
Here, eight food bloggers share their secrets to capturing stunning shots without fancy cameras or a stable of expensive props. Best of all, these tips are geared toward all kinds of beginners, whether you want to shoot your own culinary creations or simply take a great photo of your lunch to share with your friends on Instagram. In fact, if good photography is the only thing standing between you and starting a food blog, no more excuses! #3 is a great suggestion and a fun excuse to taste-test your latest creation. What’s your secret for making your dishes look amazing in pictures?
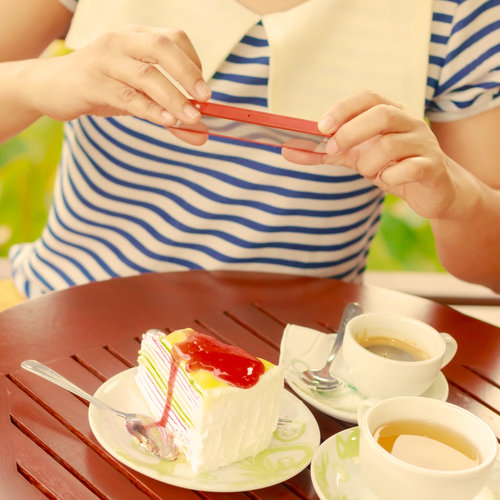
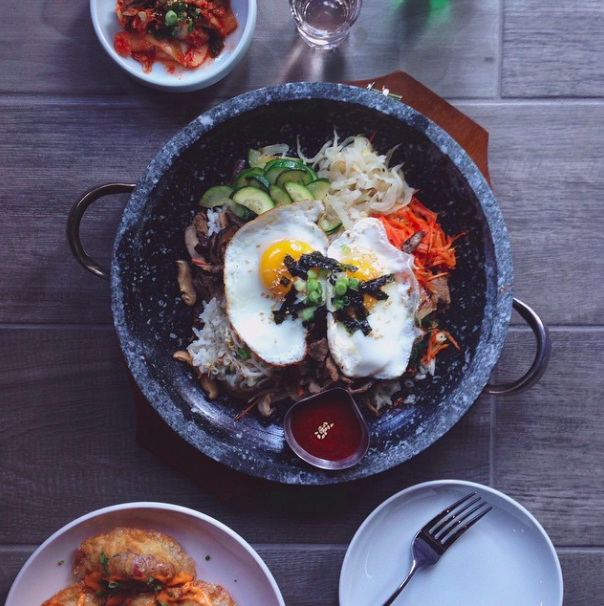
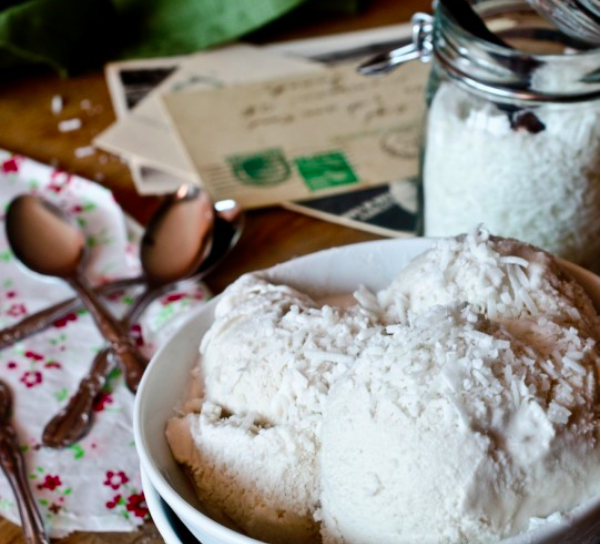
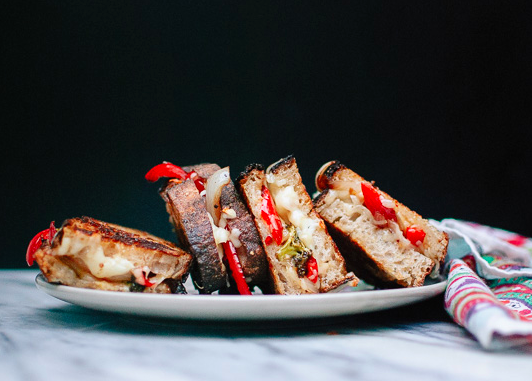
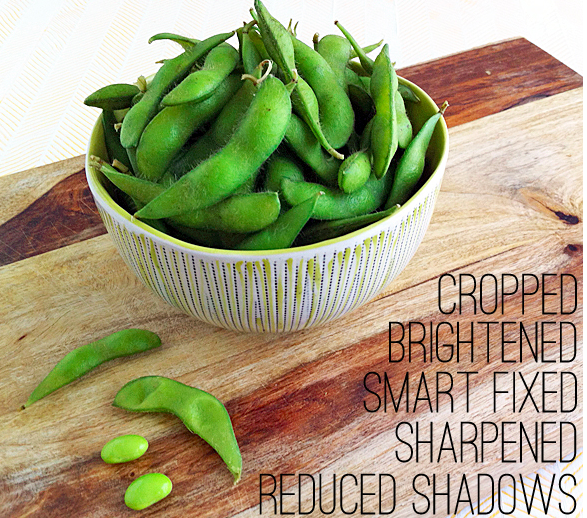
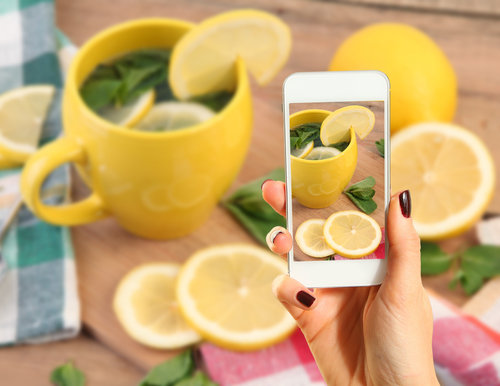
Images via ChezCateyLou/Instagram and ©iStock.com/Rasulovs “Hold the iPhone as you would a camera, with two hands,” Rodriguez advises in the blog she writes for Craftsy.com. “Keep the phone close to your body, where you have the most stability. “I recently learned the picture is taken after you release your finger from the ‘shutter’ button, not when you press it, so keep the camera steady throughout the entire process.” “Because the iPhone doesn’t have the same depth of field capabilities as a DSLR, shooting from the side doesn’t always work as well as one would like. The best way to capture a dish (or a whole table of plates) is to get the shot from above. If you do shoot from the side, keep your shot simple and with minimal props because everything in the shot will remain in focus.” “Some plates of food look better from above, or from the side, or at a 45-degree angle. Try moving around the plate and taking photos at various angles so you can pick your favorite later.” The experts at Oh My Veggies suggest that if you don’t want to invest in Photoshop, try Gimp, which is free, or Photoshop Elements, a more affordable consumer version of Photoshop. Or, if you’d rather do your photo editing online, try PicMonkey or other photo editing apps available for the iPhone. At a minimum, always crop and sharpen your images.


title: “8 Tips To Taking Perfect Food Photos” ShowToc: true date: “2024-09-21” author: “Leslie Smith”
Here, eight food bloggers share their secrets to capturing stunning shots without fancy cameras or a stable of expensive props. Best of all, these tips are geared toward all kinds of beginners, whether you want to shoot your own culinary creations or simply take a great photo of your lunch to share with your friends on Instagram. In fact, if good photography is the only thing standing between you and starting a food blog, no more excuses! #3 is a great suggestion and a fun excuse to taste-test your latest creation. What’s your secret for making your dishes look amazing in pictures?
Images via ChezCateyLou/Instagram and ©iStock.com/Rasulovs “Hold the iPhone as you would a camera, with two hands,” Rodriguez advises in the blog she writes for Craftsy.com. “Keep the phone close to your body, where you have the most stability. “I recently learned the picture is taken after you release your finger from the ‘shutter’ button, not when you press it, so keep the camera steady throughout the entire process.” “Because the iPhone doesn’t have the same depth of field capabilities as a DSLR, shooting from the side doesn’t always work as well as one would like. The best way to capture a dish (or a whole table of plates) is to get the shot from above. If you do shoot from the side, keep your shot simple and with minimal props because everything in the shot will remain in focus.” “Some plates of food look better from above, or from the side, or at a 45-degree angle. Try moving around the plate and taking photos at various angles so you can pick your favorite later.” The experts at Oh My Veggies suggest that if you don’t want to invest in Photoshop, try Gimp, which is free, or Photoshop Elements, a more affordable consumer version of Photoshop. Or, if you’d rather do your photo editing online, try PicMonkey or other photo editing apps available for the iPhone. At a minimum, always crop and sharpen your images.
title: “8 Tips To Taking Perfect Food Photos” ShowToc: true date: “2024-09-27” author: “Brendon Alexander”
Here, eight food bloggers share their secrets to capturing stunning shots without fancy cameras or a stable of expensive props. Best of all, these tips are geared toward all kinds of beginners, whether you want to shoot your own culinary creations or simply take a great photo of your lunch to share with your friends on Instagram. In fact, if good photography is the only thing standing between you and starting a food blog, no more excuses! #3 is a great suggestion and a fun excuse to taste-test your latest creation. What’s your secret for making your dishes look amazing in pictures?
Images via ChezCateyLou/Instagram and ©iStock.com/Rasulovs “Hold the iPhone as you would a camera, with two hands,” Rodriguez advises in the blog she writes for Craftsy.com. “Keep the phone close to your body, where you have the most stability. “I recently learned the picture is taken after you release your finger from the ‘shutter’ button, not when you press it, so keep the camera steady throughout the entire process.” “Because the iPhone doesn’t have the same depth of field capabilities as a DSLR, shooting from the side doesn’t always work as well as one would like. The best way to capture a dish (or a whole table of plates) is to get the shot from above. If you do shoot from the side, keep your shot simple and with minimal props because everything in the shot will remain in focus.” “Some plates of food look better from above, or from the side, or at a 45-degree angle. Try moving around the plate and taking photos at various angles so you can pick your favorite later.” The experts at Oh My Veggies suggest that if you don’t want to invest in Photoshop, try Gimp, which is free, or Photoshop Elements, a more affordable consumer version of Photoshop. Or, if you’d rather do your photo editing online, try PicMonkey or other photo editing apps available for the iPhone. At a minimum, always crop and sharpen your images.
title: “8 Tips To Taking Perfect Food Photos” ShowToc: true date: “2024-08-28” author: “Robert Rutledge”
Here, eight food bloggers share their secrets to capturing stunning shots without fancy cameras or a stable of expensive props. Best of all, these tips are geared toward all kinds of beginners, whether you want to shoot your own culinary creations or simply take a great photo of your lunch to share with your friends on Instagram. In fact, if good photography is the only thing standing between you and starting a food blog, no more excuses! #3 is a great suggestion and a fun excuse to taste-test your latest creation. What’s your secret for making your dishes look amazing in pictures?
Images via ChezCateyLou/Instagram and ©iStock.com/Rasulovs “Hold the iPhone as you would a camera, with two hands,” Rodriguez advises in the blog she writes for Craftsy.com. “Keep the phone close to your body, where you have the most stability. “I recently learned the picture is taken after you release your finger from the ‘shutter’ button, not when you press it, so keep the camera steady throughout the entire process.” “Because the iPhone doesn’t have the same depth of field capabilities as a DSLR, shooting from the side doesn’t always work as well as one would like. The best way to capture a dish (or a whole table of plates) is to get the shot from above. If you do shoot from the side, keep your shot simple and with minimal props because everything in the shot will remain in focus.” “Some plates of food look better from above, or from the side, or at a 45-degree angle. Try moving around the plate and taking photos at various angles so you can pick your favorite later.” The experts at Oh My Veggies suggest that if you don’t want to invest in Photoshop, try Gimp, which is free, or Photoshop Elements, a more affordable consumer version of Photoshop. Or, if you’d rather do your photo editing online, try PicMonkey or other photo editing apps available for the iPhone. At a minimum, always crop and sharpen your images.
title: “8 Tips To Taking Perfect Food Photos” ShowToc: true date: “2024-10-06” author: “James Farmer”
Here, eight food bloggers share their secrets to capturing stunning shots without fancy cameras or a stable of expensive props. Best of all, these tips are geared toward all kinds of beginners, whether you want to shoot your own culinary creations or simply take a great photo of your lunch to share with your friends on Instagram. In fact, if good photography is the only thing standing between you and starting a food blog, no more excuses! #3 is a great suggestion and a fun excuse to taste-test your latest creation. What’s your secret for making your dishes look amazing in pictures?
Images via ChezCateyLou/Instagram and ©iStock.com/Rasulovs “Hold the iPhone as you would a camera, with two hands,” Rodriguez advises in the blog she writes for Craftsy.com. “Keep the phone close to your body, where you have the most stability. “I recently learned the picture is taken after you release your finger from the ‘shutter’ button, not when you press it, so keep the camera steady throughout the entire process.” “Because the iPhone doesn’t have the same depth of field capabilities as a DSLR, shooting from the side doesn’t always work as well as one would like. The best way to capture a dish (or a whole table of plates) is to get the shot from above. If you do shoot from the side, keep your shot simple and with minimal props because everything in the shot will remain in focus.” “Some plates of food look better from above, or from the side, or at a 45-degree angle. Try moving around the plate and taking photos at various angles so you can pick your favorite later.” The experts at Oh My Veggies suggest that if you don’t want to invest in Photoshop, try Gimp, which is free, or Photoshop Elements, a more affordable consumer version of Photoshop. Or, if you’d rather do your photo editing online, try PicMonkey or other photo editing apps available for the iPhone. At a minimum, always crop and sharpen your images.
