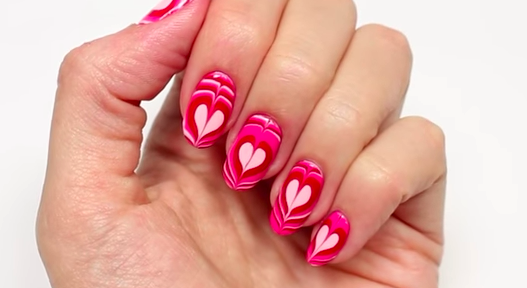
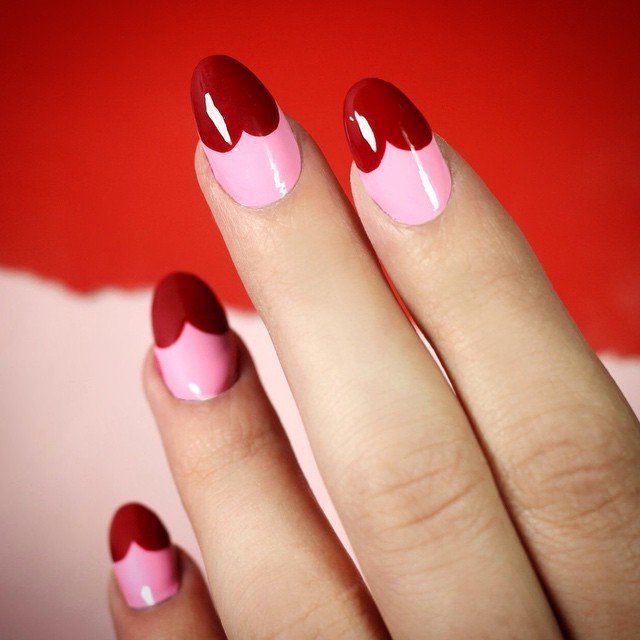
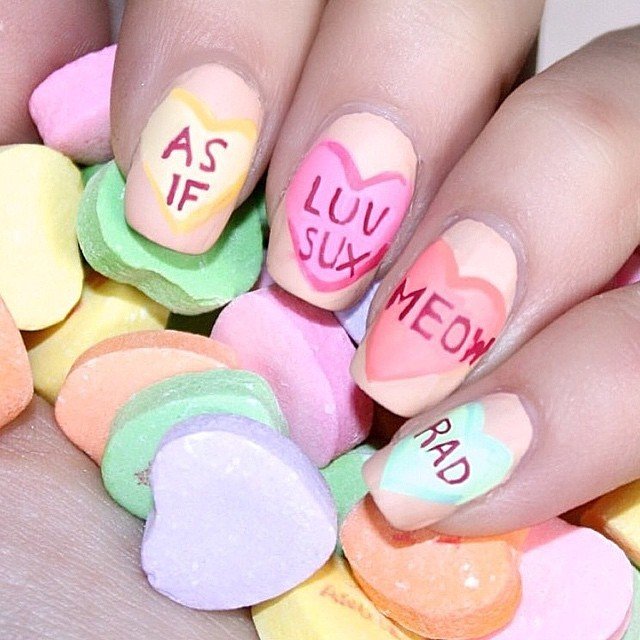
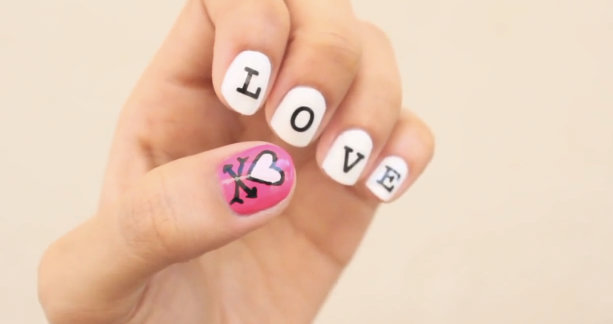
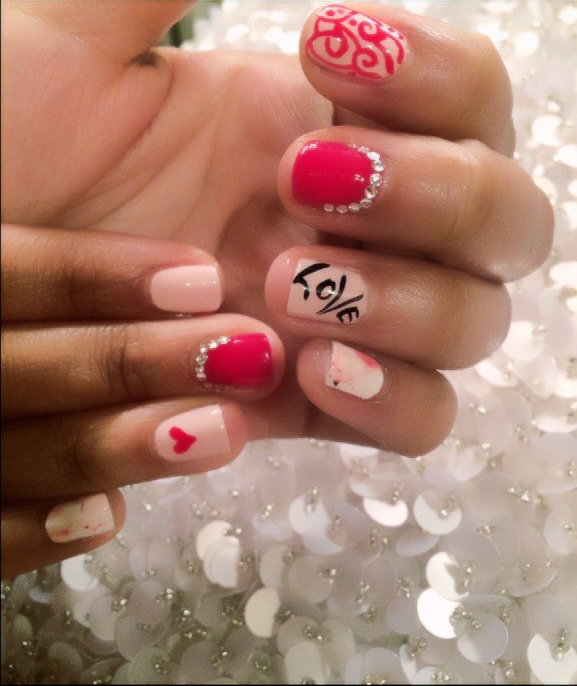
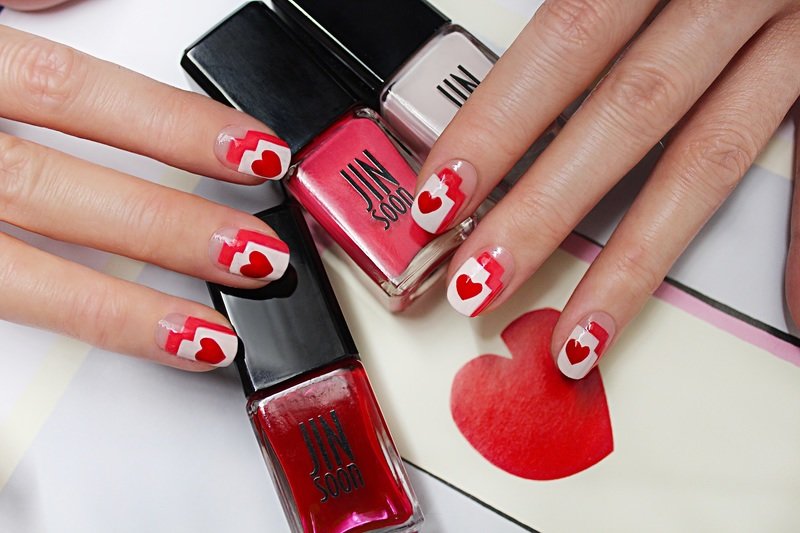
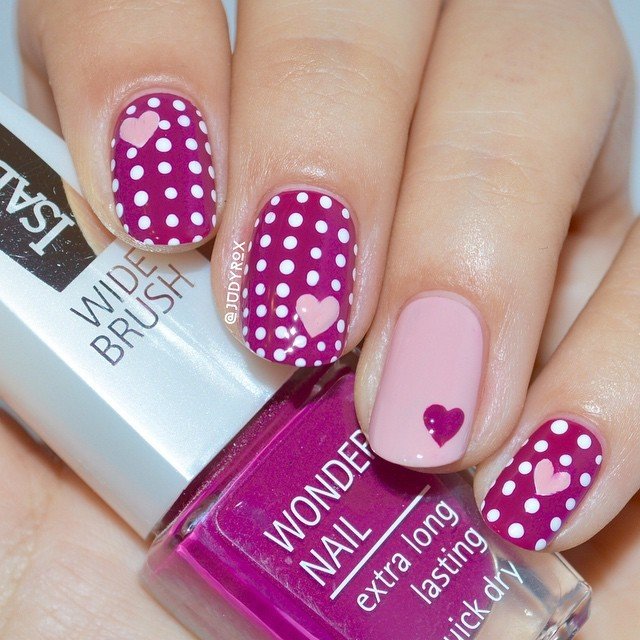
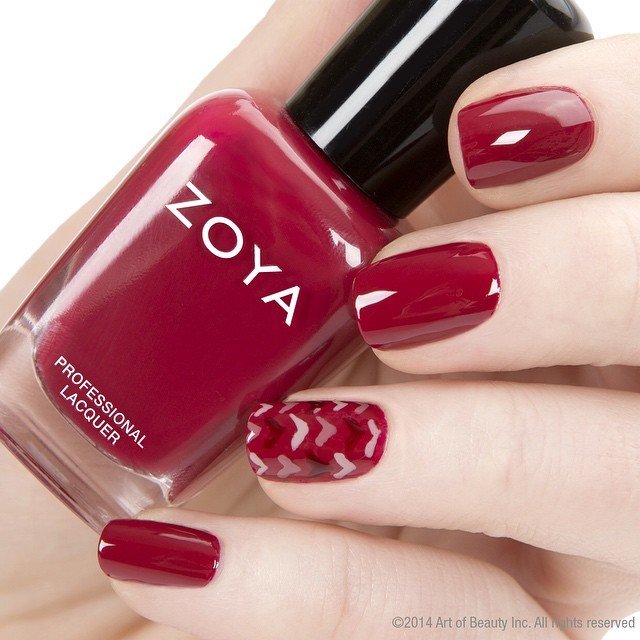
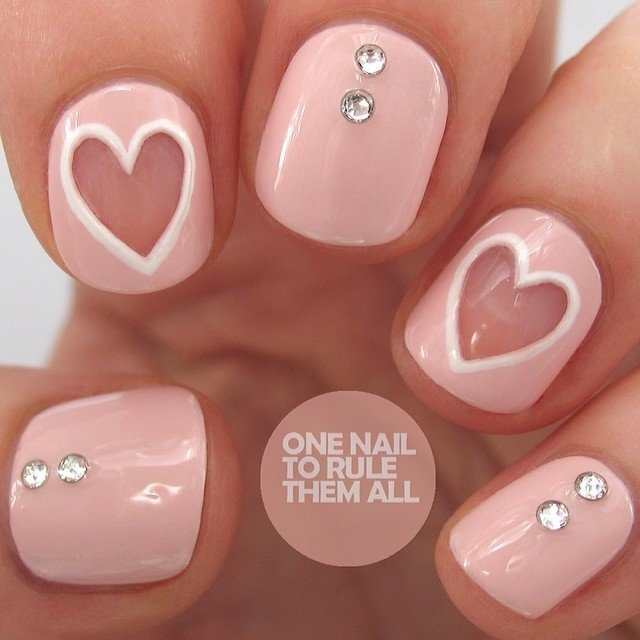
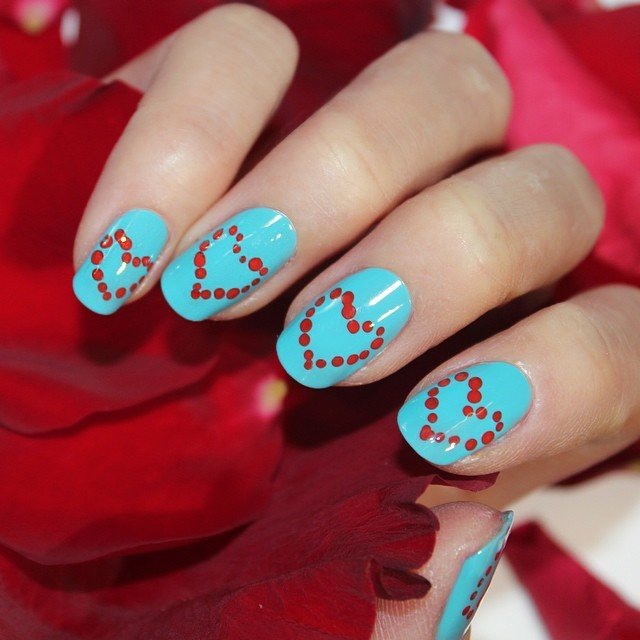
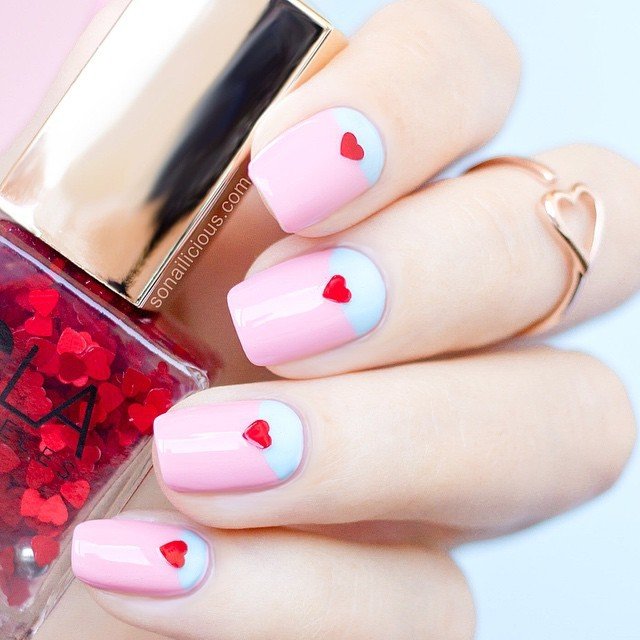
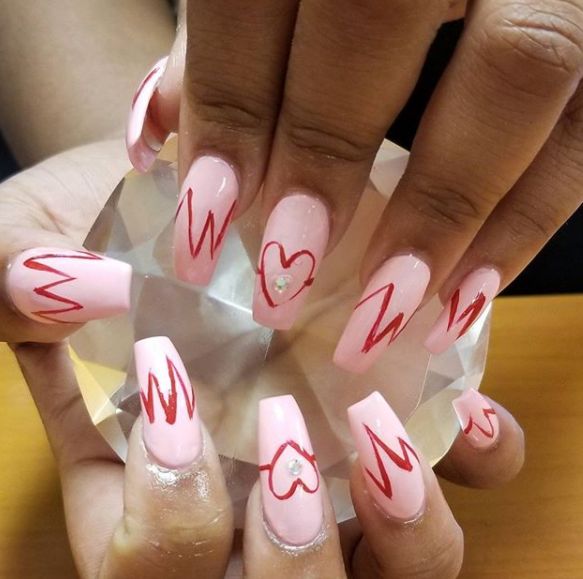
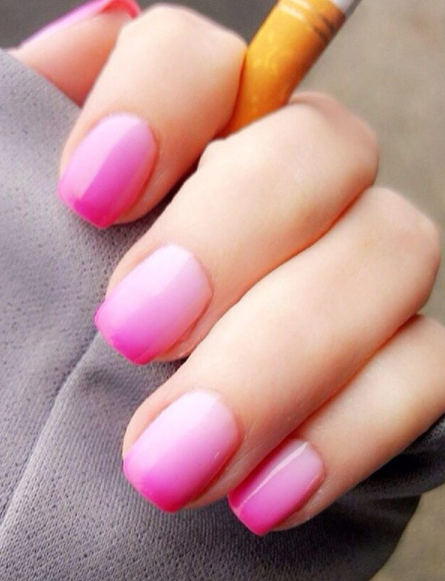
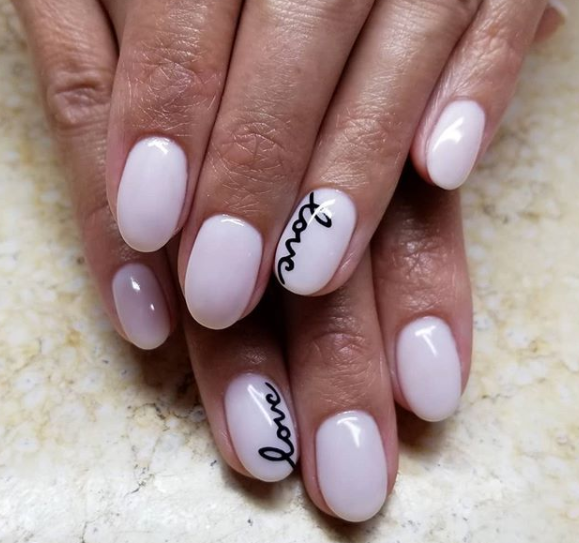
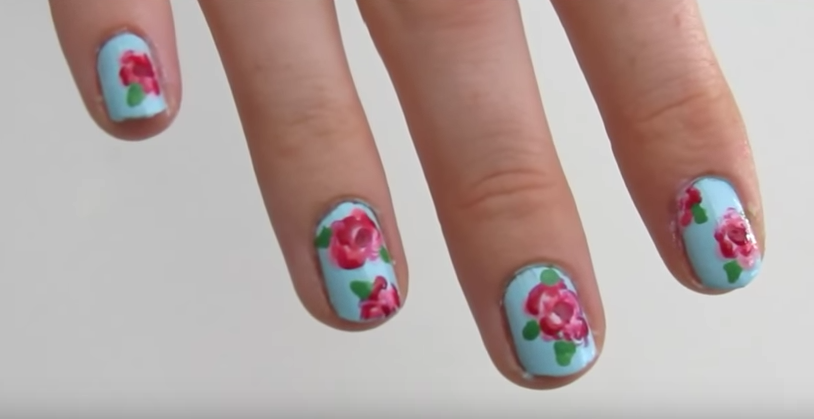
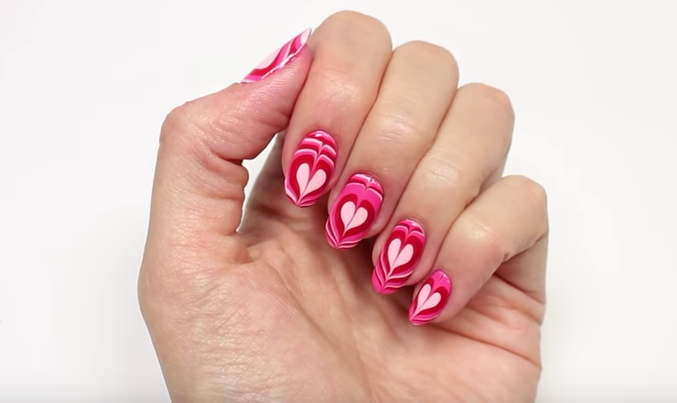
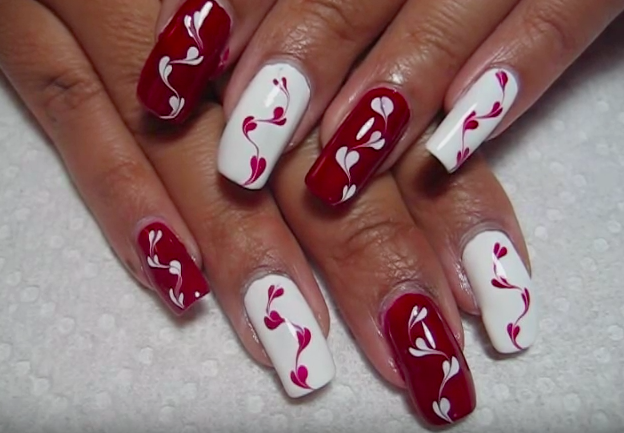
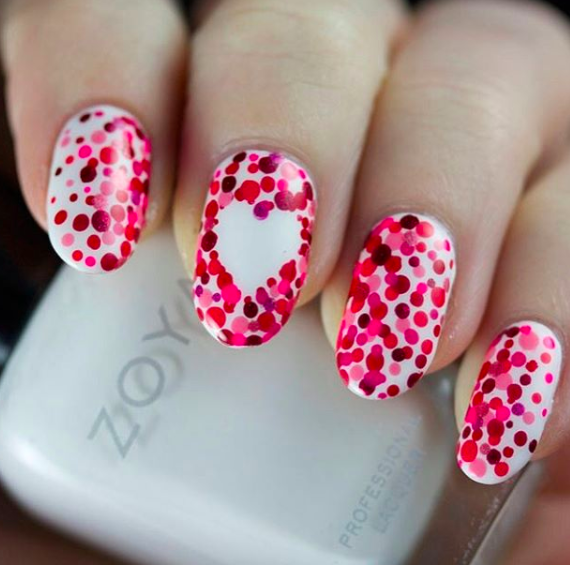
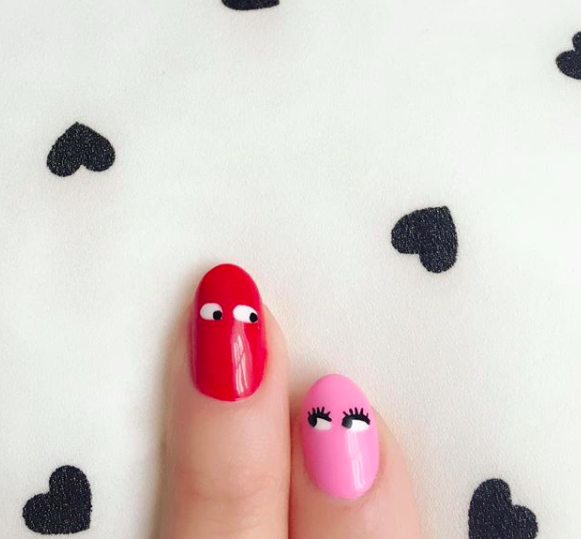
Holiday nails are undeniably festive, and Valentine’s Day nails truly just take the cake! They serve as a tribute to the cute and crafty Valentine’s Day cards we used to trade with each other in grade school. Plus, I hear that fun and festive Valentine’s Day nails are a great way to snag our crush’s attention … But on the real, despite whatever we have planned for Valentine’s Day, treating ourselves to an adorable manicure is one of the best ways to remind ourselves that we’re also our own Valentine and we deserve some TLC and pretty nails to boot. While there are zillions of ideas floating around the Internet, so we’ve rounded up 20 of the coolest, cutest, and just a little unusual Valentine-inspired nail art designs. And don’t worry — some are a little more complicated than others, but anyone really can do any of these themselves! Step 1. Give nails a mild, rounded shape by filing straight across to build the square shape and then gradually filing off the corners. Step 2. Polish all nails using a pale pink (like Fiji by Essie). Then apply a vibrant red (like Lollipop by Essie) to the middle fingers. Step 3. Now it’s time to create the accents using a small nail art brush. Paint a small heart toward the center of the ring fingernail using red. On the other hand, use black polish (like Licorice by Essie) to write “Love.” For the spiral damask-inspired design on the index finger, use the brush to create curvy strokes and scattered dots using red. Step 4. Create a dreamy ombré effect for the pinkie finger by applying both red and pale pink polish and mixing on the nail with a toothpick. Step 5. Apply a top coat (like Essie’s No Chips Ahead) to the middle fingers and place rhinestones along the base of the nail while the polish is wet. Use a toothpick to guide rhinestones into place. (Tons of inexpensive nail rhinestones can be found at Walmart!) A top coat will keep everything shiny and strong. Step 2: Create the first zig-zag / step with a pale pink nude (Jin gives a sneak peak of “Doux” from her upcoming SS15 collection here!) — drawing a zig zag line closer to the center of the nail and fill it in to the tip. (We should end up with what looks like two rectangles of different sizes joined together.) Step 3: Using JINsoon Coral Peony, trace over the zig zag above the first one. (Make sure to leave enough negative space at the cuticle line.) Step 4: Using JINsoon Coquette, draw hearts at the pale pink layer, then apply a glossy top coat like JINsoon Top Gloss to finish the look.


title: “20 Super Cute Valentine S Day Nail Art Designs” ShowToc: true date: “2024-10-19” author: “Arthur Reeves”
Holiday nails are undeniably festive, and Valentine’s Day nails truly just take the cake! They serve as a tribute to the cute and crafty Valentine’s Day cards we used to trade with each other in grade school. Plus, I hear that fun and festive Valentine’s Day nails are a great way to snag our crush’s attention … But on the real, despite whatever we have planned for Valentine’s Day, treating ourselves to an adorable manicure is one of the best ways to remind ourselves that we’re also our own Valentine and we deserve some TLC and pretty nails to boot. While there are zillions of ideas floating around the Internet, so we’ve rounded up 20 of the coolest, cutest, and just a little unusual Valentine-inspired nail art designs. And don’t worry — some are a little more complicated than others, but anyone really can do any of these themselves! Step 1. Give nails a mild, rounded shape by filing straight across to build the square shape and then gradually filing off the corners. Step 2. Polish all nails using a pale pink (like Fiji by Essie). Then apply a vibrant red (like Lollipop by Essie) to the middle fingers. Step 3. Now it’s time to create the accents using a small nail art brush. Paint a small heart toward the center of the ring fingernail using red. On the other hand, use black polish (like Licorice by Essie) to write “Love.” For the spiral damask-inspired design on the index finger, use the brush to create curvy strokes and scattered dots using red. Step 4. Create a dreamy ombré effect for the pinkie finger by applying both red and pale pink polish and mixing on the nail with a toothpick. Step 5. Apply a top coat (like Essie’s No Chips Ahead) to the middle fingers and place rhinestones along the base of the nail while the polish is wet. Use a toothpick to guide rhinestones into place. (Tons of inexpensive nail rhinestones can be found at Walmart!) A top coat will keep everything shiny and strong. Step 2: Create the first zig-zag / step with a pale pink nude (Jin gives a sneak peak of “Doux” from her upcoming SS15 collection here!) — drawing a zig zag line closer to the center of the nail and fill it in to the tip. (We should end up with what looks like two rectangles of different sizes joined together.) Step 3: Using JINsoon Coral Peony, trace over the zig zag above the first one. (Make sure to leave enough negative space at the cuticle line.) Step 4: Using JINsoon Coquette, draw hearts at the pale pink layer, then apply a glossy top coat like JINsoon Top Gloss to finish the look.
title: “20 Super Cute Valentine S Day Nail Art Designs” ShowToc: true date: “2024-10-05” author: “Ralph Bryan”
Holiday nails are undeniably festive, and Valentine’s Day nails truly just take the cake! They serve as a tribute to the cute and crafty Valentine’s Day cards we used to trade with each other in grade school. Plus, I hear that fun and festive Valentine’s Day nails are a great way to snag our crush’s attention … But on the real, despite whatever we have planned for Valentine’s Day, treating ourselves to an adorable manicure is one of the best ways to remind ourselves that we’re also our own Valentine and we deserve some TLC and pretty nails to boot. While there are zillions of ideas floating around the Internet, so we’ve rounded up 20 of the coolest, cutest, and just a little unusual Valentine-inspired nail art designs. And don’t worry — some are a little more complicated than others, but anyone really can do any of these themselves! Step 1. Give nails a mild, rounded shape by filing straight across to build the square shape and then gradually filing off the corners. Step 2. Polish all nails using a pale pink (like Fiji by Essie). Then apply a vibrant red (like Lollipop by Essie) to the middle fingers. Step 3. Now it’s time to create the accents using a small nail art brush. Paint a small heart toward the center of the ring fingernail using red. On the other hand, use black polish (like Licorice by Essie) to write “Love.” For the spiral damask-inspired design on the index finger, use the brush to create curvy strokes and scattered dots using red. Step 4. Create a dreamy ombré effect for the pinkie finger by applying both red and pale pink polish and mixing on the nail with a toothpick. Step 5. Apply a top coat (like Essie’s No Chips Ahead) to the middle fingers and place rhinestones along the base of the nail while the polish is wet. Use a toothpick to guide rhinestones into place. (Tons of inexpensive nail rhinestones can be found at Walmart!) A top coat will keep everything shiny and strong. Step 2: Create the first zig-zag / step with a pale pink nude (Jin gives a sneak peak of “Doux” from her upcoming SS15 collection here!) — drawing a zig zag line closer to the center of the nail and fill it in to the tip. (We should end up with what looks like two rectangles of different sizes joined together.) Step 3: Using JINsoon Coral Peony, trace over the zig zag above the first one. (Make sure to leave enough negative space at the cuticle line.) Step 4: Using JINsoon Coquette, draw hearts at the pale pink layer, then apply a glossy top coat like JINsoon Top Gloss to finish the look.
title: “20 Super Cute Valentine S Day Nail Art Designs” ShowToc: true date: “2024-10-24” author: “Morton Serbus”
Holiday nails are undeniably festive, and Valentine’s Day nails truly just take the cake! They serve as a tribute to the cute and crafty Valentine’s Day cards we used to trade with each other in grade school. Plus, I hear that fun and festive Valentine’s Day nails are a great way to snag our crush’s attention … But on the real, despite whatever we have planned for Valentine’s Day, treating ourselves to an adorable manicure is one of the best ways to remind ourselves that we’re also our own Valentine and we deserve some TLC and pretty nails to boot. While there are zillions of ideas floating around the Internet, so we’ve rounded up 20 of the coolest, cutest, and just a little unusual Valentine-inspired nail art designs. And don’t worry — some are a little more complicated than others, but anyone really can do any of these themselves! Step 1. Give nails a mild, rounded shape by filing straight across to build the square shape and then gradually filing off the corners. Step 2. Polish all nails using a pale pink (like Fiji by Essie). Then apply a vibrant red (like Lollipop by Essie) to the middle fingers. Step 3. Now it’s time to create the accents using a small nail art brush. Paint a small heart toward the center of the ring fingernail using red. On the other hand, use black polish (like Licorice by Essie) to write “Love.” For the spiral damask-inspired design on the index finger, use the brush to create curvy strokes and scattered dots using red. Step 4. Create a dreamy ombré effect for the pinkie finger by applying both red and pale pink polish and mixing on the nail with a toothpick. Step 5. Apply a top coat (like Essie’s No Chips Ahead) to the middle fingers and place rhinestones along the base of the nail while the polish is wet. Use a toothpick to guide rhinestones into place. (Tons of inexpensive nail rhinestones can be found at Walmart!) A top coat will keep everything shiny and strong. Step 2: Create the first zig-zag / step with a pale pink nude (Jin gives a sneak peak of “Doux” from her upcoming SS15 collection here!) — drawing a zig zag line closer to the center of the nail and fill it in to the tip. (We should end up with what looks like two rectangles of different sizes joined together.) Step 3: Using JINsoon Coral Peony, trace over the zig zag above the first one. (Make sure to leave enough negative space at the cuticle line.) Step 4: Using JINsoon Coquette, draw hearts at the pale pink layer, then apply a glossy top coat like JINsoon Top Gloss to finish the look.
title: “20 Super Cute Valentine S Day Nail Art Designs” ShowToc: true date: “2024-10-11” author: “Bonnie Prochak”
Holiday nails are undeniably festive, and Valentine’s Day nails truly just take the cake! They serve as a tribute to the cute and crafty Valentine’s Day cards we used to trade with each other in grade school. Plus, I hear that fun and festive Valentine’s Day nails are a great way to snag our crush’s attention … But on the real, despite whatever we have planned for Valentine’s Day, treating ourselves to an adorable manicure is one of the best ways to remind ourselves that we’re also our own Valentine and we deserve some TLC and pretty nails to boot. While there are zillions of ideas floating around the Internet, so we’ve rounded up 20 of the coolest, cutest, and just a little unusual Valentine-inspired nail art designs. And don’t worry — some are a little more complicated than others, but anyone really can do any of these themselves! Step 1. Give nails a mild, rounded shape by filing straight across to build the square shape and then gradually filing off the corners. Step 2. Polish all nails using a pale pink (like Fiji by Essie). Then apply a vibrant red (like Lollipop by Essie) to the middle fingers. Step 3. Now it’s time to create the accents using a small nail art brush. Paint a small heart toward the center of the ring fingernail using red. On the other hand, use black polish (like Licorice by Essie) to write “Love.” For the spiral damask-inspired design on the index finger, use the brush to create curvy strokes and scattered dots using red. Step 4. Create a dreamy ombré effect for the pinkie finger by applying both red and pale pink polish and mixing on the nail with a toothpick. Step 5. Apply a top coat (like Essie’s No Chips Ahead) to the middle fingers and place rhinestones along the base of the nail while the polish is wet. Use a toothpick to guide rhinestones into place. (Tons of inexpensive nail rhinestones can be found at Walmart!) A top coat will keep everything shiny and strong. Step 2: Create the first zig-zag / step with a pale pink nude (Jin gives a sneak peak of “Doux” from her upcoming SS15 collection here!) — drawing a zig zag line closer to the center of the nail and fill it in to the tip. (We should end up with what looks like two rectangles of different sizes joined together.) Step 3: Using JINsoon Coral Peony, trace over the zig zag above the first one. (Make sure to leave enough negative space at the cuticle line.) Step 4: Using JINsoon Coquette, draw hearts at the pale pink layer, then apply a glossy top coat like JINsoon Top Gloss to finish the look.
